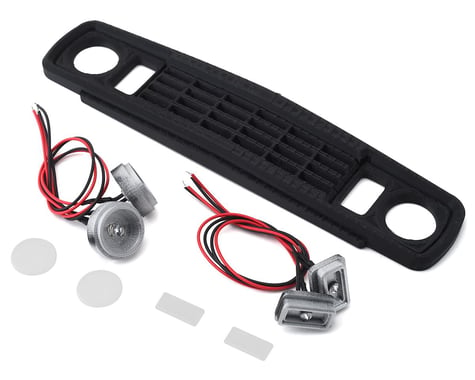
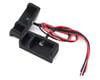
The Scale By Chris Pro-Line 77 Ramcharger Grill Insert kit is a 3D printed miniaturized replica that adds that perfect finishing touch to your Pro-Line 1977 Dodge Ramcharger body (PRO3525-00). This grill features silver light buckets with pre-installed 12V 5mm led lights that are open ended, allowing you to install the connector you prefer. Plus, the kit includes a 3D printed clear lenses to install over the top of the light buckets for a greater level of realism.
This grill measures approximately 207x44mm and can be secured using a rubberized glue, or silicone. Installation requires you cut an approximate 207x44mm hole in the front of your body. See instructions below for details.
Precision printed at .18mm layer thickness with 20% infill, Scale by Chris scale accessories are designed, printed and hand detailed in house. Printed in small batches, nothing with the SBC name is ever outsourced, meaning Chris puts his hands on every part before it goes out the door. All this effort is done to create a higher quality finished product, with the details you need to take your build to the next level.
NOTE: As is the case with most 3D printed items, some light finish work may be needed to remove excess material. Simply use a sharp hobby knife to carefully remove small strings and straggler layer lines as needed.
Instructions:
- Use a sharpie to mark the space to remove, and cut out the existing lexan grill and headlight area from the body.
- Take your time when cutting the space for the grill. Cut the hole a few millimeters smaller than the approximate 207x44mm space that is required.
- Lay low tack masking tape around the 207x44mm space you are going to remove. These will be used as guide lines for your cuts.
- Using a dremel with sanding drum, slowly remove the last of the material until you reach your tape guide lines. Test fit the grill numerous times during this process, removing small amounts of material. Fit the grill and repeat as needed until the grill is centered and the fit is tight.
- Paint body
- Use shoe goo or similar adhesive to secure the grill in place.
- Install LED light buckets using shoe goo or similar adhesive to hold secure.
- Once you are happy with the fit, use an adhesive to secure the lenses to the grill. Silicone or clear parts cement is recommended for this. Some adhesives like crazy glue or shoe goo could make the clear plastic look foggy (Note: use Tamiya X22 clear acrylic to make clear lenses more translucent)
This product was added to our catalog on August 1, 2019